
If you’re lost in the wild and in dire need of food, you can make a fish hook out of something you’re almost guaranteed to have on you.

If you’re lost in the wild and in dire need of food, you can make a fish hook out of something you’re almost guaranteed to have on you.
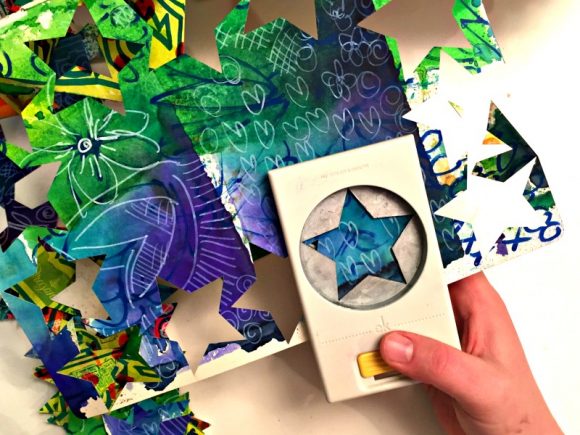
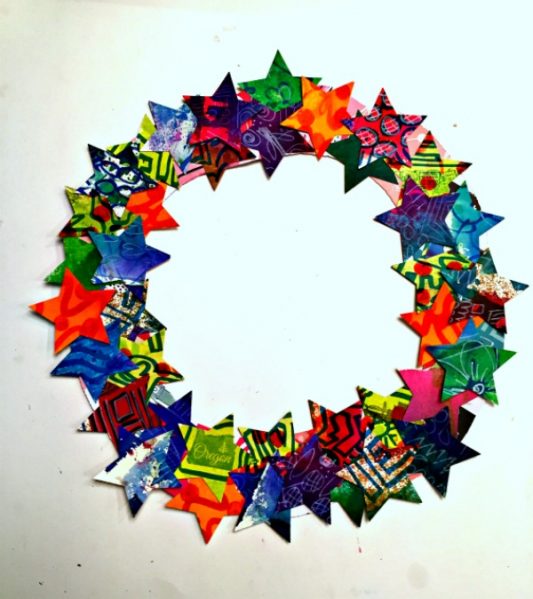
Did you hear that I'm making a wreath every day? Today I made a paper collage wreath created out of mixed media pages from one of my journals, then punched into star shapes. I love how it turned out - it has a happy, colorful quality that also evokes graffiti and found objects. If you have some scrap paper and spare art supplies, you can make this wreath! Read on to find out how:
Wreath a Day #2: Mixed Media Paper Star Wreath
This article contains affiliate links.
Supplies Used:
I used supplies I already had in my stash, but your stash will vary. Regardless, you can make colorful mixed-media pages with stuff you already have on hand, or with a few items from the dollar store. Read my related article: How to Find Art Journaling Supplies at the Dollar Store.
*Items with an asterisk can be found at the dollar store
- Watercolor paper*
- Watercolor paints*
- EK Success Large Star Punch
- 10x10" Piece of card stock
- Markers*
- White pen* (Use a White-Out pen from the dollar store)
- Glue* (I used Aleene's Fast Grab Tacky Glue)
- Scissors*
1. Creating Mixed Media Papers:
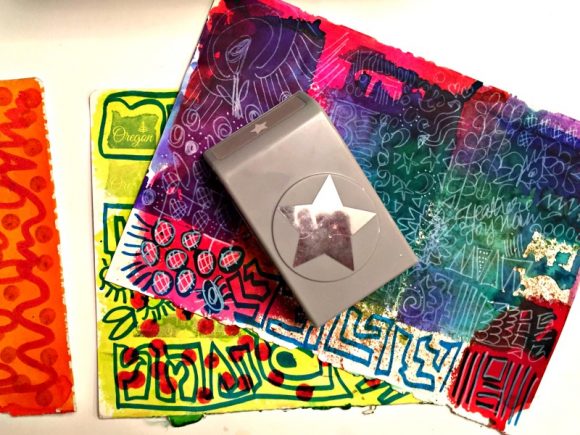
Last spring, I took a mixed media art journaling class from my locally owned art & craft store. In the class, I learned how to use Ranger Dylusions Ink Sprays (SO MUCH FUN), which are water-based pigment sprays that work like watercolor paints. In the class, we ripped several pages out of our journals to use to clean up our inks while we worked on our journals. Then, we saved each page to use for later.
If you are creating your own mixed media pages from scratch, simply
- Cover a couple pages of watercolor paper with your favorite colors of watercolor paint. Make sure to use several different colors.
- Let the watercolored pages dry completely. (Use a hairdryer to speed up the drying process, if you are impatient.)
- Doodle and write over the watercolored areas with marker. Add additional details with a white gel pen (or one of those White Out-style correction pens from the dollar store).
- You can also add any other types of embellishment you can think of, including paint splatter, smearing, paint daubs (see the red dots on the yellow page in the photo above? I used bingo marker pens from the dollar store to make those), or rubber stamped images.
Don't worry if you think the page looks ugly, or a section of a page isn't the best. Once you punch the paper, each star becomes a work of art. As you can see in the photo above, my pages weren't all that impressive.
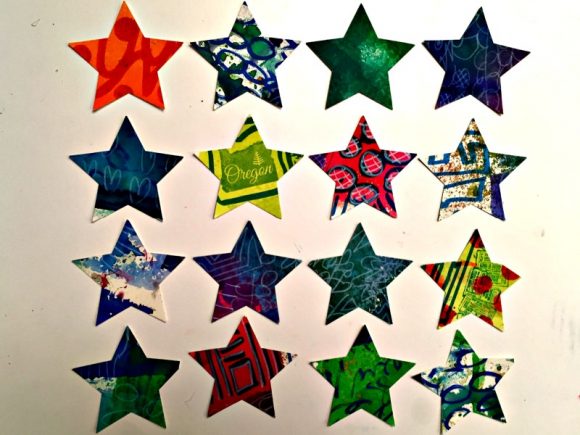
2. Next, punch out the stars.
I like to remove the bottom cover from my paper punch and punch it upside-down so I can see the paper and I can position the shape to punch out the best-looking section of the paper. Punch one side of the paper, then trim away the jagged paper to cut the next section of the paper.
3. Create a wreath form
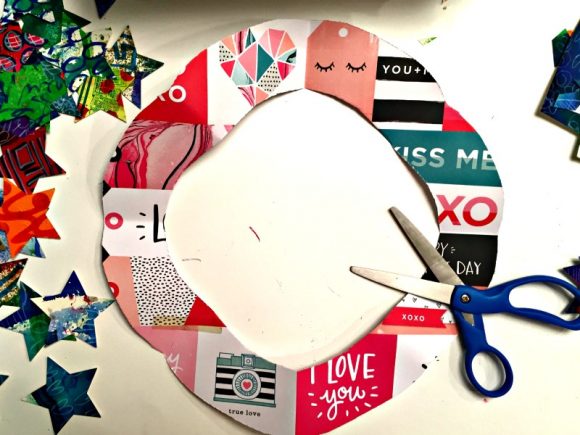
Since this wreath is just made from paper, I decided to create my own "wreath form" with a piece of card stock. I folded a large square piece of paper into quarters, then cut an arc shape out of the corner, and a hole in the middle.
As you can see, my wreath form isn't perfectly round. I didn't mind that for this particular wreath.
4. Glue stars to the wreath form
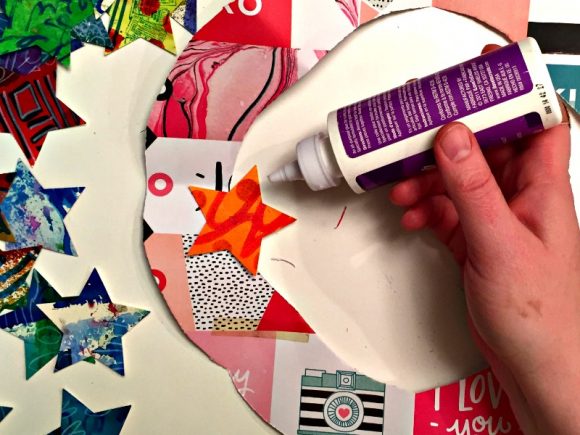
This step is pretty self-explanatory! One thing to think about is layering your less-favorite stars onto the wreath first, as you will be gluing other stars overlapping them. Spread the different colors of stars evenly around the wreath.
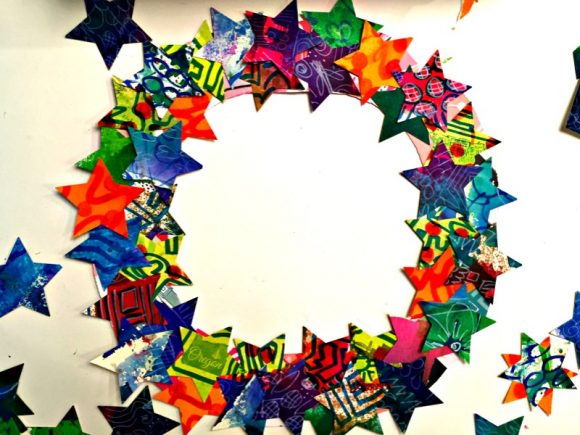
I had a lot of stars left. They are so neat! I made sure to save them all (as well as the background papers I punched out) for a future mixed media project. Maybe I'll add them to my art journal.
I hope this project has inspired you to make something today! You can use some of the techniques explained here to create your own unique artistic wreath.
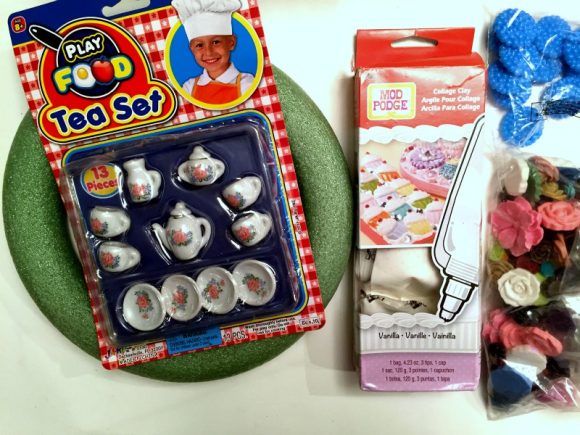
Today's wreath will teach you how to decorate a wreath form with frosting-like clay (decoden), and embed an adorable tiny tea set, creating the cutest wreath for tea lovers. I got the wreath form at the dollar store, and the rest of the supplies for this craft from my stash. This wreath is super easy to make, and it looks so darn cute when it's finished.
Wreath a Day #3: Tea & Frosting Decoden Wreath
This article contains affiliate links.
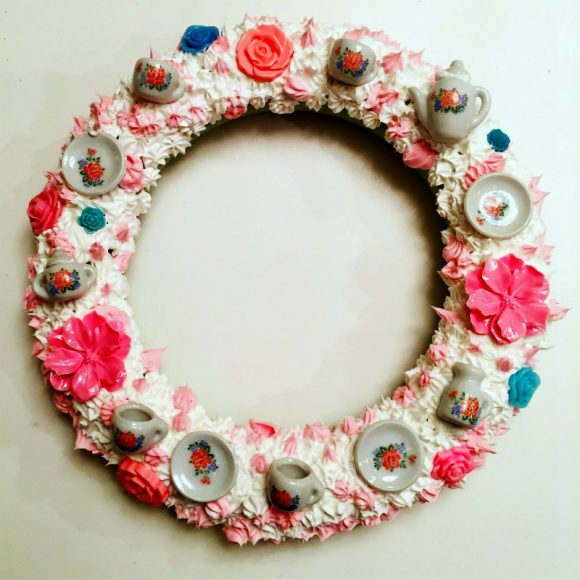
Have you heard of decoden? It's a silicone clay that looks like frosting, and is great for decorating just about any item. You can embed little trinkets, rhinestones, or other items in the clay, and when it dries it looks like a delicious, whimsical, treat, but it's completely permanent.
For this project, I used Mod Podge Collage Clay, which is by far the easiest and quickest version of decoden frosting I have found. You can also create your own "frosting" with silicone caulk and a decorating tube nozzle.
Supplies Needed:
- Foam wreath form*
- Mod Podge Collage Clay, white and pink
- Tiny ceramic tea set*
- Resin flower cabochons
*Items with an asterisk can be purchased at the dollar store
I got the tiny tea set in the $1-2 dollar section at my local toy store, but you can sometimes find comparable tea sets at your local dollar store. The resin flower cabochons can be purchased from many different online places, including Amazon, eBay, and Etsy.
Step 1: Decorate the Wreath with Pink Decoden Frosting
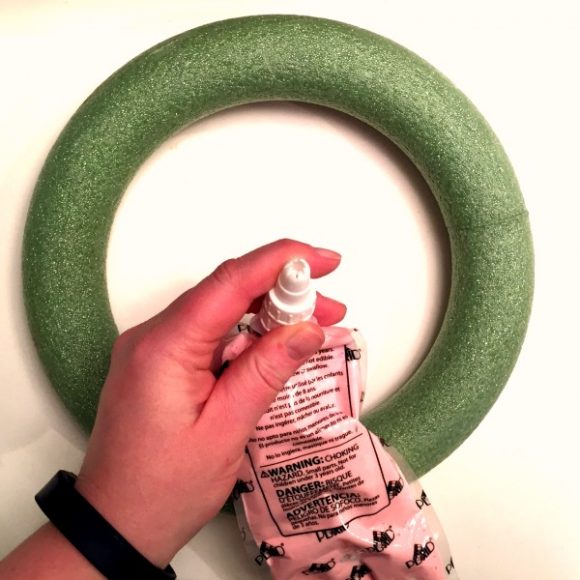
If you use Mod Podge Collage Clay, this step is very simple. Remove the lid on the pouch of collage clay, screw on your chosen frosting tip (several tips are included in the box), and start decorating.
I chose the star tip and decided to pipe random stars of pink frosting on my wreath form.
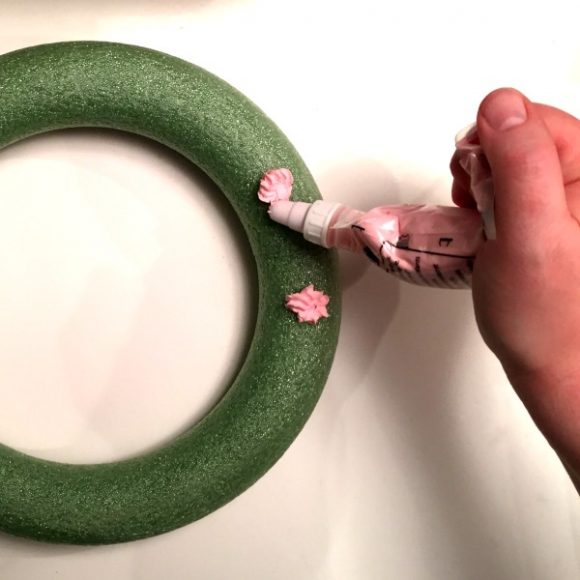
If you are concerned with perfection, you can practice on a scrap surface first, but remember, you will be embedding things into the collage clay later, so you can easily cover up any ugly frosting dollops. Squeeze from the bottom of the tube and lift the tip to create a star.
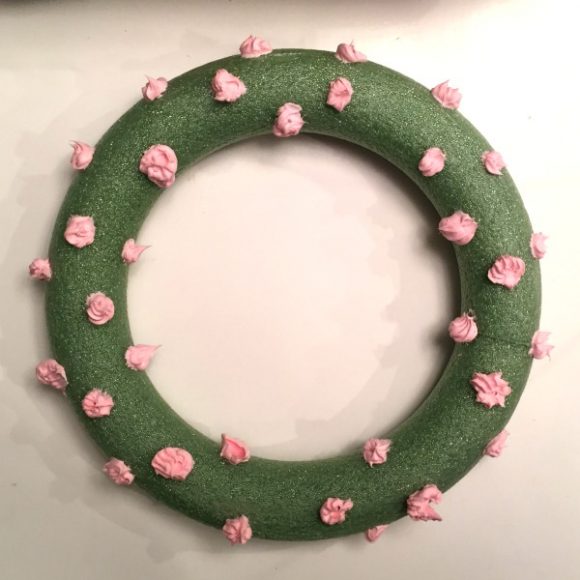
As you can see, my frosting dollops weren't that good. I think it's because I got the collage clay out of my cold garage and it needed to come to room temperature first. You can solve this problem by leaving the lid on the pouch of frosting and gently kneading it for a minute or two. Or, just keep your collage clay inside your house instead of in your freezing cold garage!
Step 2: Fill in the Wreath with White Frosting
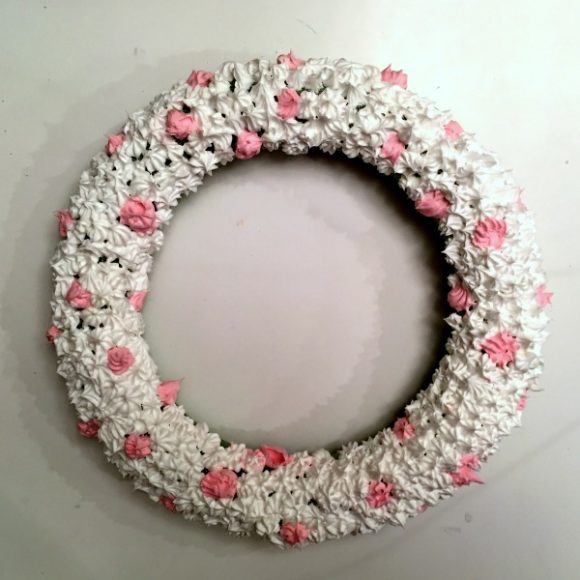
Next, fill in the rest of the wreath with white frosting. As you can see, I have a few gaps in some areas of my wreath. This is something we can fix later.
Step 3: Add the Embellishments
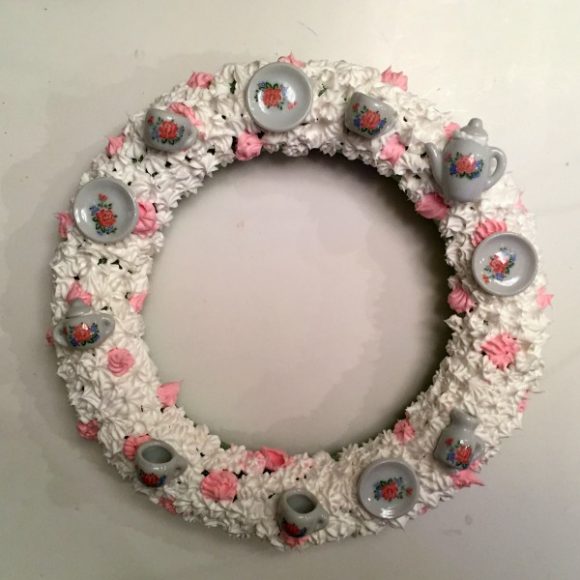
Space your tea set around the wreath. Use a dollop of decoden frosting to keep the lids on the teapot and sugar bowl.

Add the resin flower cabochons to fill in the blank spots. I also added some contrasting blue flowers around the wreath to add a little bit of visual interest.
Fill in any remaining gaps in frosting with the rest of the frosting.
Let the decoden frosting dry overnight, or according to package instructions.
See all the wreath a day wreaths here!

Comedian and entrepreneur Kevin Hart continues to expand his influence. This time around he’s teaming up with HISTORY for a two-hour event titled Kevin Hart Presents: The Black Man’s Guide to History. HISTORY describes the program as a look at lesser-known, yet important black history stories—all filtered through the lens of Kevin Hart.
“I’m very excited to be working with HISTORY on this show because not only is it entertaining, and it’s hysterical, but it also is an important program for our country right now. We hope to make people laugh and learn a bit too,” said Hart.
The show begins as Hart finds his daughter upset after watching the film 12 Years A Slave, believing that black history appears to only be about slavery and oppression. According to HISTORY, this prompts Hart to educate her through scripted re-enactments about fascinating, black, American, historical figures that aren’t as well known. Examples of historical figures re-enacted in the show include: Matthew Henson, the first person to go to the North Pole, but did not receive the credit; Robert Smalls, a former slave who led a revolt on a Confederate warship and pretended to be the captain to evade capture; Mae Jemison, the first black female astronaut; and Henry “Box” Brown, a slave who courageously mailed himself to a free state in a box.
“Kevin is an extraordinary performer with a real appreciation for history,” said Paul Cabana, executive vice president and head of programming, HISTORY. “Only he could bring these true stories to life in such an entertaining way. We’re thrilled to be working with him.”
Hart will star and executive produce the two-hour event from Hartbeat Productions and Comedy Dynamics. An airdate has yet to be announced.
